Avatar Creation: Difference between revisions
(restored) |
No edit summary |
||
| Line 2: | Line 2: | ||
==Character Creation== | ==Character Creation== | ||
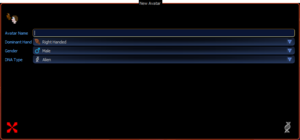
[[File:Avatar_type.png|right|thumb|The first part of the avatar creation UI]] | |||
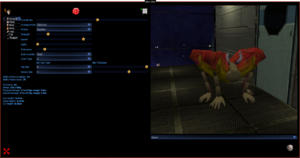
[[File:Avatar_creation.png|right|thumb|The second part of the avatar creation UI]] | |||
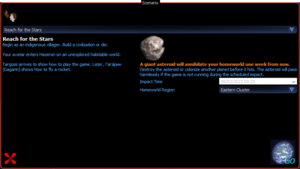
[[File:Spawn_Type_New.png|right|thumb|The UI for scenario selection]] | |||
Once you've logged in, you'll be presented with a three part process for creating an avatar. First, you'll see a few basic options for your avatar, including its name. You're also given the option of creating an Alien or Human avatar. Gen IV (Human) is currently unfinished and lacks many abilities that Gen III (Alien) has, so it's currently recommended to use Gen III. | Once you've logged in, you'll be presented with a three part process for creating an avatar. First, you'll see a few basic options for your avatar, including its name. You're also given the option of creating an Alien or Human avatar. Gen IV (Human) is currently unfinished and lacks many abilities that Gen III (Alien) has, so it's currently recommended to use Gen III. | ||
| Line 28: | Line 31: | ||
A description of each type can be seen at the bottom left of the creation UI. | A description of each type can be seen at the bottom left of the creation UI. | ||
[[File: | [[File:Spawn_Type.png|none|thumb|All spawn options available.]] | ||
===Spawn Region=== | ===Spawn Region=== | ||
Revision as of 06:33, 24 February 2024
Avatar creation is what all players start their Hazeron journey with. You'll have the ability to create your character, name it, select a spawn type and spawn region.
Character Creation


Once you've logged in, you'll be presented with a three part process for creating an avatar. First, you'll see a few basic options for your avatar, including its name. You're also given the option of creating an Alien or Human avatar. Gen IV (Human) is currently unfinished and lacks many abilities that Gen III (Alien) has, so it's currently recommended to use Gen III.
Note: This page also lists your existing avatars once created, but for now you'll need to make a new one.
Tip: The avatar name does not have to be unique. Any number of avatars can use the exact same name.
Upon selecting Gen III and naming your avatar, press the DNA button at the bottom right to proceed. This proceeds to part two. You'll then be given a variety of options. You're given a select amount of points which you can spend on the DNA, alongside some other limits such as eye height having to be within certain bounds.
With these points, you can allocate stats such as Speed or Endurance, alongside making the avatar bigger or adding more limbs as necessary.
Do note that if you add wings, you'll need to select the checkbox "Can jump or fly" under the "Body" tab in order to actually be able to fly with them.
Ensure that there are no red errors given underneath the customization area, and you'll be good to go.
Once you're happy with the look and stats of the avatar, simply click the asteroid button in the bottom right to continue to the third part, scenario selection.
Spawn Type
There are five distinct spawn scenarios.
- Reach for the Stars is a completely fresh start on a random habitable world, with an asteroid impact happening a week from spawning.
- Citizen of the Galaxy includes you joining an existing empire, for easily creating secondary avatars and joining them to your main empire.
- The Savage State is the same as Reach for the Stars, except there's no starting village, no Targoss and no asteroid impact and you start with only a knife.
- Lost Atlantis asks you to create an empire before spawning, and starts you in deep space within the bridge of Haxus' Atlantis starship design.
- Stowaway starts you as a stowaway somewhere aboard a pirate ship. You have a basic weapon and need to find your bearings.
If you select Reach for the Stars, you are shown the impact date and time of the asteroid next to the spawn type. This can be offset by plus or minus 12 hours, to give a bit of flexibility.
A description of each type can be seen at the bottom left of the creation UI.

Spawn Region
In addition, you'll find the "Homeworld Region" option in the scenario selection UI, above the Go button. This determines what part of the galaxy you'll spawn in. This can be set to North, East, West and South, with a cluster or frontier option for each respective axis. You'll also find an aptly named "Remote" spawn option.
All avatars start in the Shores of Hazeron galaxy.
Cluster and Frontier seemingly choose from the same spawn ranges currently. Eastern Cluster is the default option, and was in the past before the region was able to be selected.
Remote places you completely randomly in the starting galaxy.
Because Hazeron Starship is currently singleplayer, you won't encounter other players regardless of your spawn type.
Finishing up
Once you're done, click the "Go" button with the planet at the bottom right. This will be greyed out if something hasn't been selected properly for the scenario, so double check that if needed.
It may be worth checking out The Basics page to familiarize yourself with the controls before entering.
This will enter you into the game at your chosen spawn region, on a random habitable planet (unless using Atlantis or Stowaway scenarios). For the next steps, see Starting as an Emperor.